Homeowners in Pembroke Pines use their kitchens hard. Between weeknight cooking, weekend family meals, and storm-season prep, a garbage disposal earns its keep. The question is whether a do-it-yourself garbage disposal installation saves money or creates headaches. The answer depends on the sink setup, electrical condition, and the homeowner’s comfort with plumbing and wiring. Here is a clear look at what matters before picking up a wrench, and where a licensed plumber makes the difference.
How a disposal actually works
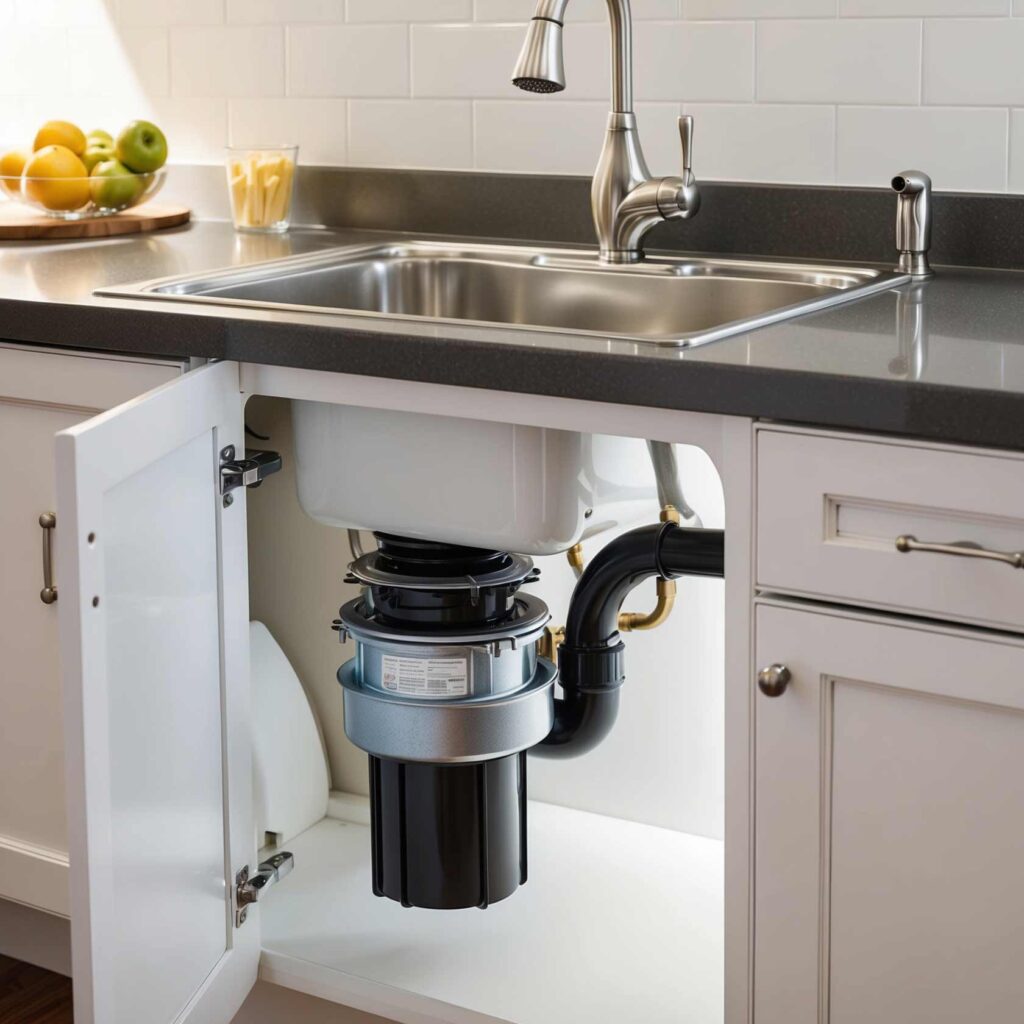
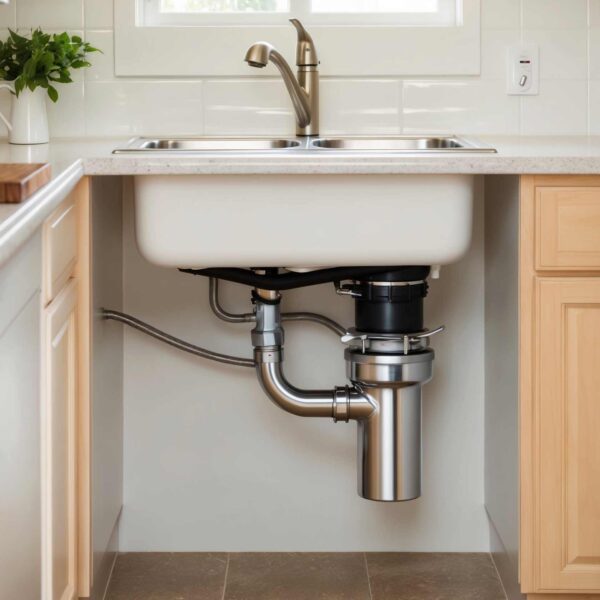
A garbage disposal does not use blades like a blender. It uses a grind ring and impellers that push food scraps against the ring to pulverize them. Water flushes the slurry into the drain line. A standard unit mounts under the sink, locks into a sink flange, and connects to the P-trap and dishwasher discharge hose. Power comes from a cord to a dedicated outlet or a hardwired connection controlled by a wall switch or an air switch.
This simple summary matters because it shows where problems start: a loose sink flange causes leaks, a misaligned trap causes clogs, a poor electrical connection trips breakers, and a missing dishwasher knockout prevents the dishwasher from draining. A correct garbage disposal installation prevents all of these.
Local reality in Pembroke Pines, FL
Broward homes vary. Many kitchens in Pembroke Pines have cast iron or stainless steel sinks, with a mix of PVC and older ABS drains, and 1/2 hp to 3/4 hp disposals. Homes built in the 1990s and 2000s often have a cabinet outlet under the sink. Older townhomes and 1970s ranch layouts sometimes have hardwired disposals with no receptacle. There are also condo buildings with strict HOA rules on noise and permitted horsepower.
Humidity and water quality in South Florida also matter. Gaskets and putty can cure slower on humid days. Undersink cabinets run warm and damp, which speeds up corrosion on cheap mounting rings. A pro considers these factors when selecting materials and sealing methods.
Safety first: electricity, water, and tight spaces
Water and electricity share a very small space under a sink. That alone is the biggest reason to slow down before trying a DIY install. The breaker must be off, the outlet must be grounded, and the switch must control only the disposal. An air switch is safer around sinks since it uses a pneumatic button instead of a live electrical switch.
On the plumbing side, a person will work upside down, reaching into a tight cabinet with sharp sheet metal edges. A disposal weighs 10 to 16 pounds. Holding it with one hand while turning a locking ring with the other can be awkward. Even experienced plumbers use a bucket, a towel, knee pads, and a helper for heavier units or deep sinks.
The DIY path: what it takes to get it right
A first-time installer can complete a standard replacement in 1 to 3 hours if the following are true: the old unit already used a 3-bolt mount, the sink flange is solid, the outlet works, and the trap lines up. A direct replacement with similar horsepower and brand is the easiest project.
There are common sticking points. The old mounting ring can fuse to the sink, especially on older units with corrosion. Removing it without bending the sink flange takes patience. Replacing the flange requires a careful bead of plumber’s putty or the exact foam gasket specified by the manufacturer. Too much putty causes squeeze-out and leaks later when it dries. Too little leaves voids. Experience helps set an even, thin ring that compresses cleanly.
Discharge alignment is another hurdle. Disposals set the outlet at a fixed height. If the P-trap is too high relative to the wall arm, the water will back up. Adjusting the trap may require cutting and gluing new PVC or using the right slip-joint fittings. Overusing accordion-style flex drains is a shortcut that breeds clogs. A pro prefers smooth, properly sloped fittings to maintain flow.
Finally, there is the dishwasher knockout. New disposals ship with a knockout plug inside the dishwasher inlet. It must be removed only if a dishwasher will connect. Forgetting to punch it out leaves the dishwasher full of water at the end of a cycle. Punching it out when no dishwasher is present creates an open port that leaks. These small details decide whether the install works on day one.
Where calling a pro saves time and money
A pro install is faster. For the team at Tip Top Plumbing & Restoration, most standard replacements in Pembroke Pines take 45 to 90 minutes, including cleanup and testing. The team carries multiple sizes of gaskets, extension flanges for thick sinks, and trap adapters, so no mid-project store run is needed. If the old wiring is unsafe or the outlet is ungrounded, a licensed plumber can coordinate with a qualified electrician or provide a code-compliant cord-and-plug solution with a GFCI-protected circuit.
Professionals also catch upstream issues. A slow drain is not fixed by a new disposal. If the kitchen line is restricted by grease, scale, or a belly in the pipe, a pro will test flow before and after installation and provide a cleaning option. That prevents a callback and keeps odors down.
In many homes, space is tight due to pull-out trash bins or low garbage pails inside tiptop-plumbing.com sink disposal repair the cabinet. A plumber helps select a compact model with the right horsepower to fit the space without cutting shelving. That is the kind of detail that keeps the cabinet usable.
Choosing the right disposal for a South Florida kitchen
Horsepower matters less than build quality and features, but it still counts. For a household of two to four people, 3/4 hp offers a good balance of power and noise. For heavy use or frequent fibrous scraps, 1 hp models grind smoother and clog less, though they are heavier and larger. Stainless steel grind components resist corrosion in humid environments and last longer than galvanized steel.
Noise ratings vary. Quieter units use better insulation and anti-vibration mounts. Under a shallow sink, noise travels. A pro can recommend models that fit the sink depth and still leave hand room. For Pembroke Pines condos or townhomes with shared walls, quieter units reduce neighbor complaints during late dinners.
An air switch can be a smart upgrade. It mounts on the countertop or in the sink deck, which avoids running wet hands to a wall switch and keeps the backsplash clean. If a countertop hole is not available, a pro can use a soap dispenser knockout or offer discrete mounting options.
Hidden costs of DIY that do not show on the box
A basic disposal box includes the unit, mount, and discharge elbow. It rarely includes a power cord, wire connectors, plumber’s putty, additional gaskets, or a new trap kit. It also does not include a jigsaw to notch a cabinet shelf, a torque wrench for tight collars, or an extra set of hands.
There is also risk. A slipped wrench can crack a brittle PVC trap. An overtightened metal ring can deform a stainless sink. A miswired connection can trip a breaker or heat a wire nut. Each of these can turn a small weekend project into a weekday emergency call.
Anecdotally, about one in four DIY calls Tip Top sees in Pembroke Pines stems from a small leak that went unnoticed for a few days. By the time the smell gives it away, the cabinet floor is swollen. Swollen particle board does not flatten again. Replacing a cabinet floor or boxing out rot costs far more than a professional install.
Real job notes from the field
A homeowner in SilverLakes swapped a builder-grade 1/3 hp disposal for a big 1 hp model. The new unit sat lower and the discharge ran below the wall drain, so water had to push uphill. The sink gurgled, and the dishwasher leaked from the air gap. The fix involved raising the wall arm, replacing the trap, and reorienting the dishwasher hose to reduce a dip. The new unit worked fine, but the project would have been smoother with a pre-check of outlet height and trap geometry.
Another client in Chapel Trail had a beautiful apron-front sink with a thick fireclay deck. Standard sink flanges did not reach the threads on the disposal mount. Tip Top used an extended flange designed for 1.5-inch-thick sinks. The right part turned a frustrating job into a clean install.
DIY checklist for a straight swap
- Confirm power: test the switch, confirm GFCI protection, and verify the breaker is off before working. Check fit: measure from the sink drain to the centerline of the wall drain to confirm the new disposal’s outlet will meet the trap without uphill flow. Inspect the flange: look for a solid, flat seat. Replace the flange if pitted or bent, and use fresh plumber’s putty or the manufacturer’s gasket as specified. Align the discharge: dry-fit the elbow, trap, and dishwasher hose to avoid strain or kinks before tightening. Test under load: run water, run the disposal, and run the dishwasher through a drain cycle while watching for weeps and drips.
If any step looks off, pause and call a pro before water damage starts.
What code and best practice look like
While local interpretations can vary, safe garbage disposal installation follows clear standards. The unit should be on a dedicated or appropriately sized circuit. A GFCI-protected outlet is recommended in wet locations. Cords should be listed for disposals and strain-relieved where they enter the base. No open splices under the sink. The switch should clearly control the disposal and nothing else that can surprise a user.
On the drain side, the dishwasher hose must have a high loop or an air gap, as required by local code or the dishwasher manufacturer. The trap must be accessible and seal without leaks, and all slip joints should point in serviceable directions. Discharge pipes should maintain continuous slope. Using solvent-welded joints in the wrong places makes future service harder; a pro chooses slip joints at points that need maintenance.
Signs a professional install is the smarter move
If the existing disposal is hardwired without a junction box, it is time to involve a licensed professional. If the sink is cracked around the drain, replace the flange and re-evaluate whether the sink needs attention. If there is a persistent sewer odor, a venting issue may be present, which a new disposal will not fix. If the cabinet shows water damage, test for slow leaks and correct the cause before adding a new unit.
An HOA or condo in Pembroke Pines may have horsepower limits or quiet-hour rules. A local plumber knows the standards and can recommend models that comply.
How much a homeowner should expect to spend
Retail prices for disposals run roughly from $120 to $450 depending on horsepower, noise insulation, and grind materials. A compact 1/2 hp unit is on the low end. A quiet 1 hp stainless model sits near the top. Professional installation in Pembroke Pines typically falls in a moderate range for straightforward replacements, with additional costs if electrical work, flange replacements, or trap reconfigurations are needed. When comparing, include the cost of a cord kit, putty, and any trap parts.
While a DIY swap might save labor, a single leak can erase that savings. That is the real calculus: the cost of labor versus the risk of an under-sink leak or a slow drain that surfaces after the fact.
Noise, vibration, and real-world use
Even well-installed disposals can vibrate thin stainless sinks. Anti-vibration mounts and rubber sink gaskets help, but some hum will carry. Heavier units vibrate less, but they can stress thin flanges if hung without support during installation. A plumber often supports the unit on a small jack, paint can, or box during the lock-in to protect the flange and the installer’s wrists.
As for what to grind, small soft scraps are fine with cold water running steady. Bones, fruit pits, and celery threads shorten a motor’s life and jam impellers. Grease belongs in the trash, not the drain. These habits matter more than brand choice for long-term performance.
Home resale and inspection impact
Disposals show up on inspection reports. Inspectors check for proper cord strain relief, a working switch, a no-leak trap, and correct dishwasher routing. A disposal wired with a lamp cord, a missing knockout plate, or a flex drain full of grease can flag a finding. A clean, code-observed garbage disposal installation helps a sale move faster.
Simple maintenance that prevents calls
Run cold water before, during, and for 15 seconds after use. That keeps fat in a solid state and flushes debris. Every few weeks, run a few ice cubes and a slice of lemon rind for a quick freshen. Avoid caustic cleaners; they attack seals. If a jam occurs, turn the unit off, use the included hex key on the bottom to free the impellers, and press the reset button. If that fails, stop and get help before burning the motor.
Why homeowners in Pembroke Pines choose Tip Top Plumbing & Restoration
Local context matters. Tip Top’s plumbers work in Pembroke Pines every day, from garbage disposals Walnut Creek to Towngate to Grand Palm. They know which condo boards require air gaps, which neighborhoods have older ABS drains, and how to route a dishwasher hose in a tight corner sink. They stock parts on the truck and clean up the cabinet like they found it.
Most importantly, they stand behind the work. The team pressure-tests for leaks, verifies the dishwasher drains, checks electrical safety, and walks homeowners through operation and care. If a unit fails under warranty, they coordinate the replacement without leaving the homeowner to chase a manufacturer.
The short answer: DIY or hire a pro?
If the job is a like-for-like swap with good access, a working outlet, and modern plumbing, a careful homeowner with the right tools can make it work. If there is any doubt about wiring, sink flange condition, trap alignment, or dishwasher routing, calling a pro protects the cabinet, the countertop, and the schedule.
Tip Top Plumbing & Restoration offers same-day garbage disposal installation across Pembroke Pines, FL, with transparent pricing and models in stock. For a quick quote or to book a visit, contact the team today. A clean, quiet, properly installed disposal is one call away.
Tip Top Plumbing & Restoration provides full plumbing service in Pembroke Pines, FL. Our local plumbers handle emergency calls, leak detection, clogged drains, and water heater repair. We also perform drain cleaning, pipe repair, sewer line service, and piping installation. From kitchen plumbing upgrades to urgent water line issues, our team delivers fast and dependable results. Homeowners and businesses across Pembroke Pines trust Tip Top Plumbing & Restoration for clear communication, fair pricing, and reliable workmanship.
Tip Top Plumbing & Restoration
1129 SW 123rd Ave
Pembroke Pines,
FL
33025,
USA
Phone: (954) 289-3110
Website: https://tiptop-plumbing.com/, Google Site
Social Media: Instagram, Facebook, Yelp, LinkedIn, X
Google Map: View on Google Maps